
Guide
Populating CIB Nurtures
Creation and Configuration Steps
Use the steps below to populate the project CIB nurture campaign in HubSpot.
Please note: these instructions are designed for projects that have a CIB already created by Engaging Partners. If your project does not have a CIB already created, reach out to Engaging Partners. See this guide to download project request
Project Nurtures
Amend Forms
Step 1:
- Locate the form within the Campaign Hub and amend the pre-selected Project Estate ID.
- Naming convention: [PROJECT CODE]_[Persona/Product]_[Type]_Download-Form_MMYY
- E.g. BUSH_Persona_Investor_Download-Form_0723
- What best describes you? (Buyer profile)
- What property type are you interested in?
- Interested in purchasing (project-specific).
- Project Estate ID
- Project Affiliation
- Sync lifecycle stage
- Should be 'lead' for download forms and 'MQL' for project enquiry forms.
- Campaign tags
- Add project specific campaign tag to each form after it has been created in CRM. For more information visit here.
Under 'Options' in the form editor:
- Ensure the "Thank you message" is redirected to the correct page.
- Please note: The thank you message cannot be redirected until the page is published. See more information below.
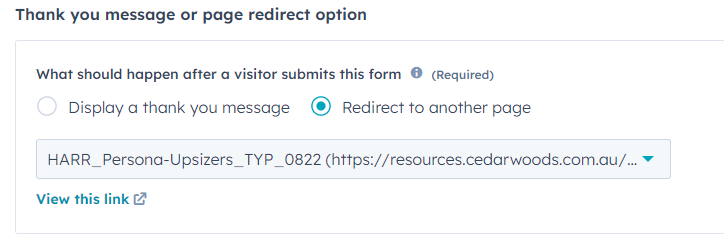
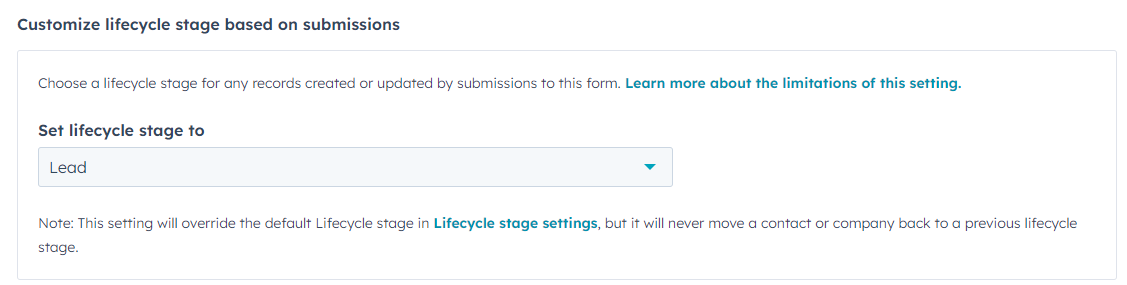
- Set lifecycle stage to 'Lead' or 'MQL' depending on the purpose of the form.
- If desired, add a HubSpot notification for each time the form is filled out.

Design and Populate Web Pages
Step 2:
eBook Landing Pages
- Each guide requires both a download page and a thank you page, as well as a project enquiry landing page and thank you landing page.
- These should already be set up in the project's CIB campaign.
Download page:
- First, update the image and the form to ensure the correct information. This is done using the left-hand navigation bar.
- Image required: Landing Page Image eBook 1164x1010 with transparent background.
- Next, amend the copy to provide more information about the guides.
- Finally, edit the carousel images to the downsizer images.
- Images required: Image Carousel 1440x489
Resource Hub Page
- Amend the 'Download Guides' and 'Community Information' card blocks to include gated content and all other information available to homebuyers.
- Do this by following the below steps:
- Click on the content block you would like to edit to open the 'Sidebar Content' on the left-hand side.
- Amend the heading and introductory copy if required.
- Navigate to the 'post' section of the content bar by scrolling down.
- Click on each of the posts you would like to amend.
- From here, you can update card block imagery, headings, content and button links.
- Each button should link to the eBook Download landing pages you created in the previous step.
- Click 'next' to edit additional card blocks.
-
- Images required: Featured image 1200x600
- For 'ungated' content, add this into the 'Community information' section and link to a file as opposed to the HubSpot landing page.

- 'Videos' available should be relevant to your project (e.g. Customer Testimonials) however if you do not have any, input relevant Cedar Woods video content.
- Video content could include:

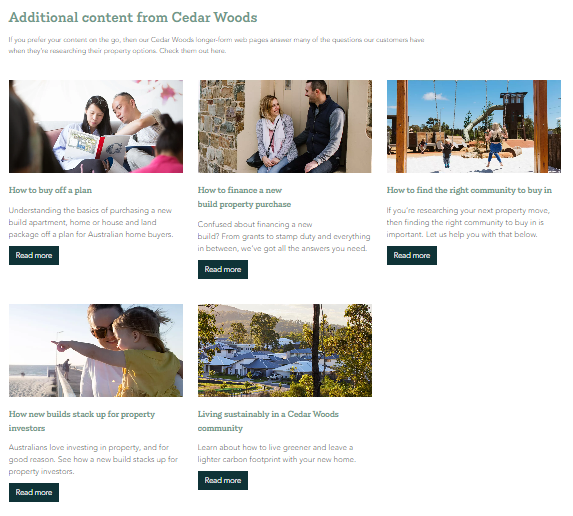
- Additional content should always be the same and link to the corporate site. Sections that should be included here are:
Linking the Anchors on the Resource Hub Page:
- When you select a module or content on the page, each section should be assigned a 'Section ID' in order to act as an anchor and link the CTA's at the top of the Resource Hub Page.

- If the anchors are not working correctly when the page is live, check within the modules of the page to ensure the anchor has been set up and linked correctly.
- To do this, click on the module (e.g. 'Download Guides' and copy the Section ID given on the left-hand side.
- Then, navigate to the anchor module of the page and review the custom buttons at the bottom.
- Ensure the 'URL' section matches the Section ID exactly, with a '#' in the front.
Create CTAs and the CTA Directory
Step 3:
- Within the campaign, you will see a number of CTA's (Legacy) that need to be reviewed.
- CTAs are broken into EMAIL format and WEBSITE format.
- There is one CTA for each line of gated content.
HubDB Directory:
- Navigate to Marketing > Files and Templates > HubDB.
- Find the designated CTA directory for your chosen project.
- Amend the 'title', 'website description' and 'email description' based on how you want the CTA to appear.
- Each CTA created, will have a unique Website and Email code which needs to be added to this directory.
- This unique code can be found within the actual 'CTAs' in the campaign hub.
- Navigate back to the Campaign Hub and find 'CTAs' under assets.
- Find the WEB CTA for your chosen guide.
- Open the CTA > Edit > copy the unique code from the URL.
- Navigate back to the HubDB table and add this code to the table.
- Repeat the above steps for the EMAIL CTAs.
- Amend images based on the following sizes:
- Email CTA - 600 x 600
- Web CTA - 1176 x 1036
- Publish directory.
Linking Landing Pages with CTAs:
- Back in the Campaign Hub, amend each of the CTA's in the 'Asset' tab.
- Open each CTA > Edit > Next
- Ensure the CTA is linked to the correct landing page.
- This is only to be done for gated content.
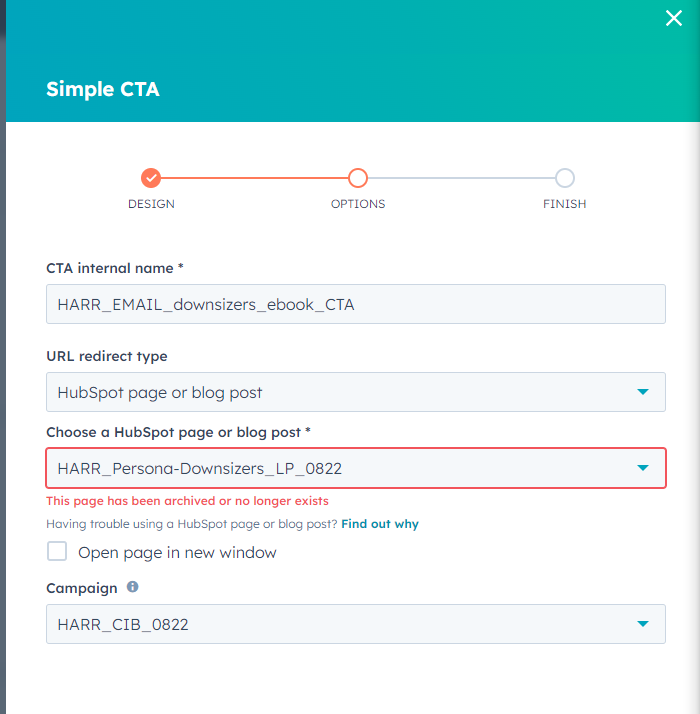
- If your guide is ungated, change the "URL redirect type" to "File Link" and attached the document.
- If the landing page link is broken, it will appear like below until it is published.
Create Emails
Step 4:
Emails required for nurtures:
- Product nurtures
- House and land (if relevant to project) (3 emails required).
- Townhomes / Apartments (if relevant to project)(3 emails required).
- Persona nurtures
- First Home Buyer (3 emails required).
- First Home Buyer Finance (3 emails required).
- Upgrader (3 emails required).
- Downsizer (3 emails required).
- Investor (3 emails required).
- Interested in Purchasing (3 emails required - generic).
- Lead to MQL (After they downloaded a guide) (3 emails required).
- REA (optional)
- Listing enquiry (3 emails required).
- Facebook lead ads (3 emails required).
- Native lead ads (3 emails required).
- Project enquiry form (1 email required).
Editing Emails
- Email layout example here.
- AB Testing on the Bushmead project shows that emails should have a header image and in-text buttons within the email.
- At the bottom of each email, amend the 'dual column modules' to change the call to action at the bottom of each email.
- There should be a range of CTAs within the one email series, depending on the email required.
Workflows and Final Review
Once the above steps have been completed, speak to Matt Bennell or Emma Fletcher for workflow amends and a final review before pushing live.
Image Resources
Image Catalogue - for a guide on all of the different image sizes that are needed for the set up of your CIB.
Photoshop Templates - Working Photoshop files are available to assist with creating graphics.
National Training Recording