
Estates by Product Type
Create Campaign
STEP 1
First, you will need to create a campaign in HubSpot to store and track assets.
Best practice is to clone the existing campaign here. This prevents having to create workflows and forms from scratch.
Each campaign should consist of 1 form and 1 workflow.
Next, you will need to create a campaign tag in CRM to add to each form.
If you need assistance on creating campaign tags in CRM, refer to this article.
Amend Form
STEP 2
Next, you will need to amend the details on each form to make it specific to your state.
Before you edit the form, there are a number of 'Properties' you will need to amend in order for the dynamic form to work correctly.
Depending on what product types your state offers, amend the below properties and add in your project name.
- Land/House and Land Project Filter
- E.g. If QLD, add in Ellendale.
- Townhomes Project Filter
- E.g. If QLD, add Greville as an option.
- Apartments Project Filter
- E.g. If SA, add in Bloom
- Commercial Project Filter
Make sure to add in all relevant projects for each product type.

Next - time to amend the form.
The filters you will need to amend are:
- What are you interested in?
- Remove product types that are not relevant to your state.
- What best describes you?
- Remove buyer types that are not relevant to your state.
- Project campaign.
- Pre-select your newly created campaign tag and ensure the field is hidden.
Please note: Project estate ID, Project Affiliation etc. should not be added as this will be changed during the workflow AFTER the form is submitted.
The second thing required to amend in the form is the 'logic' behind each form.
Click on the 'What are you interested in' property' and then select 'Logic'.

Scroll down on the left-hand side and find 'dependent fields'. Review each of the rules and determine which is relevant for your state.
For example, if your state does not have and commercial properties, remove 'Commercial' 'Office' etc.

Back on the form - select the 'Dependent Fields' section within the form to amend each property option.

Select each condition and remove estates that are not relevant.


Repeat the above for each property type.
* Make sure you only remove the irrelevant estates from the form, and do not delete these estates from within the properties field.
Once this is complete, the form is ready to be published.
Don't forget to rename the form!
Workflows
STEP 3
Now time for the fun part. Workflows.
Click on the contact enrollment trigger and change the form to the name of the form you just created. This means that any time someone fills out this form, they will be enrolled in this workflow.


Next, you will need to amend the "Filter by State" property. Just like above, click on the module and then select your chosen state. Make sure you remove Victoria and that you are always 'Apending' not 'Replacing' this field.

Next, you will need to create your own 'If/Then' branch depending on your state. The best thing to do is just copy step by step what was done for VIC.
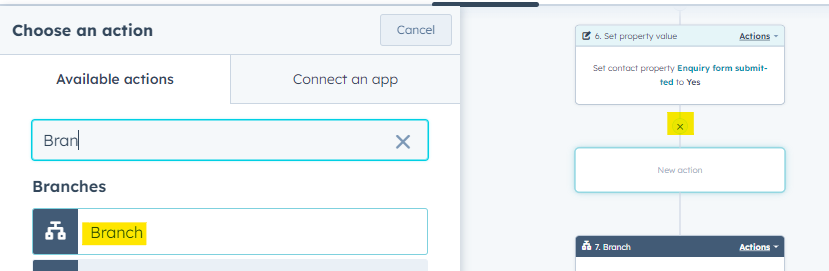
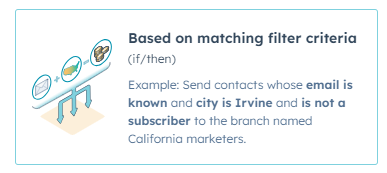
Click on the + symbol and select 'Branch'. Then select 'based on matching filter criteria'.
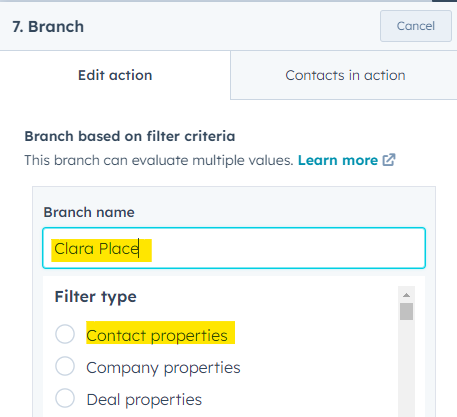
Each branch should be for each project. Use the properties amended above as the criteria for each branch.
Add a branch name and then select 'Contact Properties'.
Search for the Project Filter property relevant to that branch and select the option.
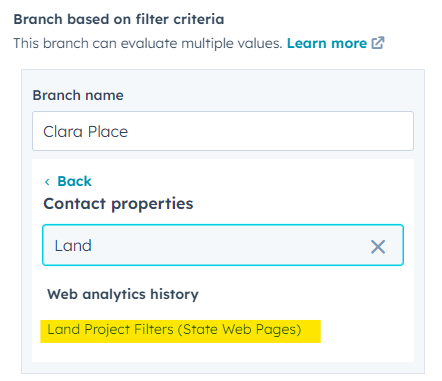
Use 'Is any of' and select your project. Apply filter.
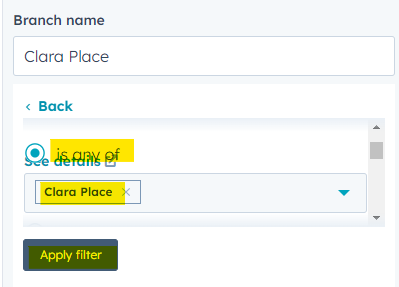
If a project has both apartments and townhomes (e.g. Greville) you should use the 'Or' criteria to add two options.
Repeat the above steps until each of your state projects have a branch.
Under each branch you then need to set:
- Project estate ID.
- Apend project subscription preferences.
- Set contact owner.
- Send Auto-Response email.
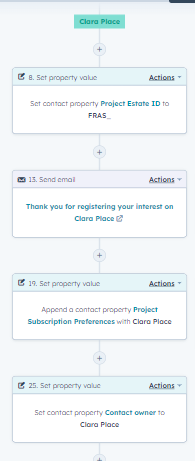
This can be done by Clicking on the plus again and using 'Set Property Value' and 'Send Email' actions.
Once this is complete for each branch, the workflow is ready to be published.
When publishing - make sure you don't enrol existing contacts.
Add Form to Microsite
STEP 4
Once the workflow has been published, you are now ready to add the HubSpot forms to the Kentico State Pages.
It is requested that a form be added to every page.
If you need assistance in how to add a form to Kentico, review this training guide from page 6.