HubSpot Popup Forms
Creation and Configuration Steps
Use the steps below to create a basic popup form in HubSpot. Similar instructions for slide-in and banner forms coming soon.
HubSpot Pop-up Forms.
Form Type Selection
Step 1:
- Navigate to Marketing > Lead Capture > Forms.
- Create a new form and select the pop-up box
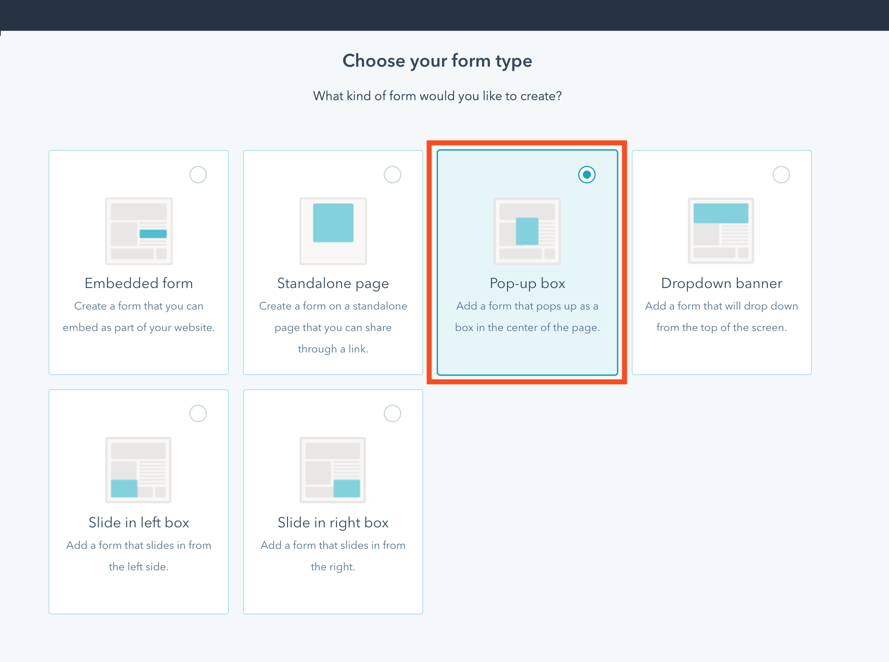
*Please note there are different types of pop-up / slide-in forms. Each has slightly different functions, however, all have the same trigger options with slight setting changes.
This article is on the standard pop-up.
Set up your form by choosing the following:
- Featured image: select a featured image to display on both the callout and form step (pop-up box and slide-in box only).
- Callout text: enter text for the main header on the callout.
- Callout body: enter any additional information or details on the callout. This is optional.
- Callout button text: enter the callout form button text.
- Theme color: set the theme color for the button on your pop-up form. Select a custom color from the color picker or manually enter a hex value.

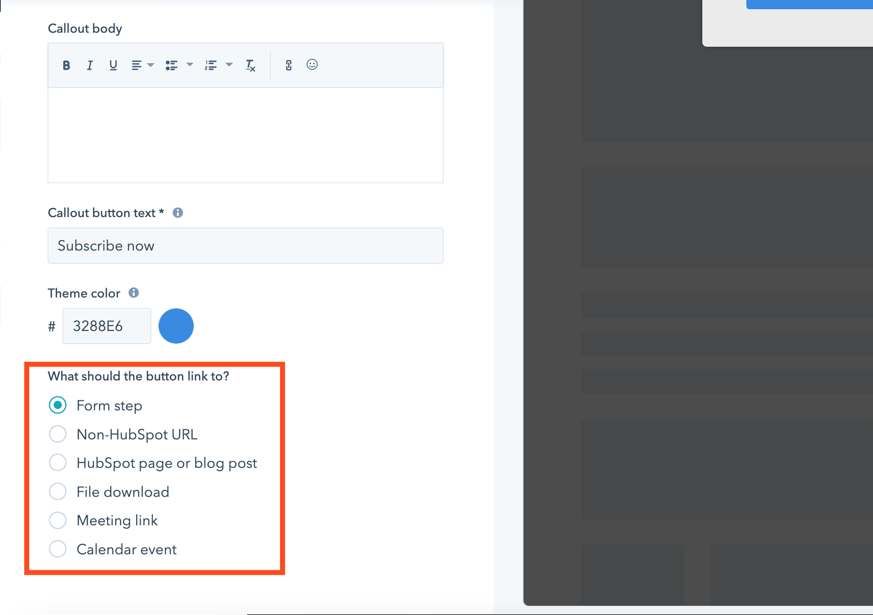
Form Action
Set the link action:
Step 2:
The link button is the area responsible for how the form will behave.
- Form step: direct your users to a form from the pop-up form. Customise your form by clicking on the Form tab.
- Non-HubSpot URL: enter a link to an external page.
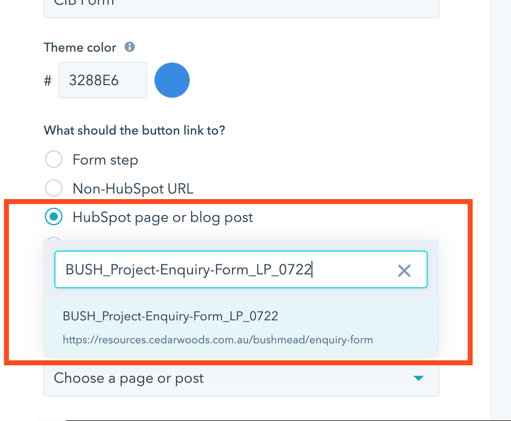
- HubSpot page or blog post: select a page or blog post in the dropdown.
- File download: click Browse files to add your file.
The following 2 options are not needed
Meeting link: select a meeting link from the dropdown menu.
Calendar event: create a calendar event and configure your event details. The event will be created in the customer's Google or Outlook calendar.
To direct a user to a CIB enquiry form, select the HubSpot page or blog post option and enter the page name you would like to direct to.
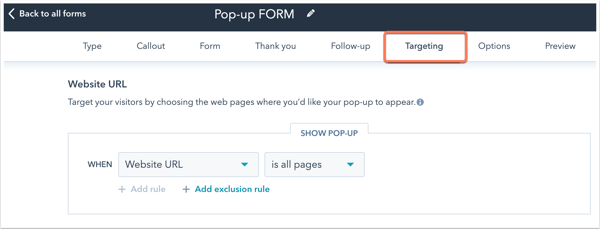
Popup-Form Targeting
Set Targeting Options
Step 3.
URL Conditions
You can add conditional logic for specific webpage URLs and/or query parameter values. By default, the pop-up form will appear on all pages. Use exclude rules if you don't want a pop-up appearing on a page.
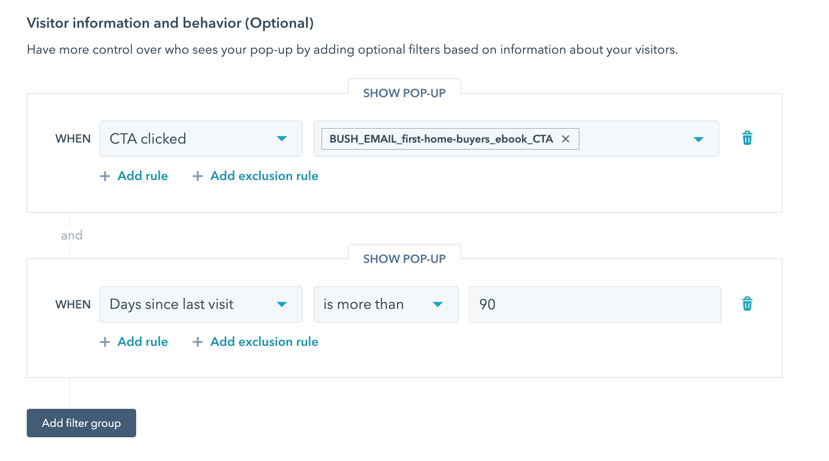
Visitor information and behaviour (Optional)
You can also target your pop-up form to specific contacts based on known visitor information and behavior.
More than one condition can be applied to combine different triggers.
Settings
Triggers:
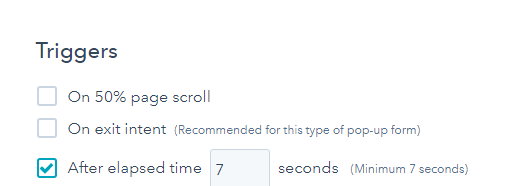
Step 4
Set when the pop-up form should appear on the page.
You can select the following options:
- On 50% scroll: the form will appear when the visitor has scrolled halfway down the page.
- On exit intent ( Pop-up form only): the form will appear when the visitor moves their cursor to the top bar of the browser window.
- After elapsed time: the form will appear after the specified amount of seconds.