Create a blog post
Creating new blog posts for your project
Explained by AI for a 5-year-old 😉
Creating a blog post in HubSpot is like making a picture book. First, you choose a topic for your story, like "My Favorite Animals." Then, you write your story by adding words and sentences about your favorite animals, like lions and elephants. Next, you can make your story more interesting by adding pictures of the animals. You can even change the colors and sizes of the pictures to make them look nice. Finally, when you're happy with your story, you can publish it so that other people can read it and enjoy your pictures and words.
How to create blog posts
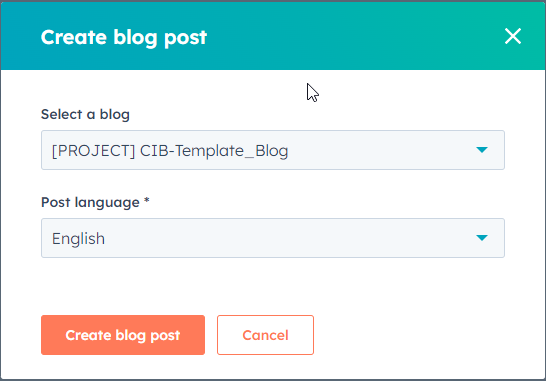
Creating a post
Creating Blog Posts
Step 1:
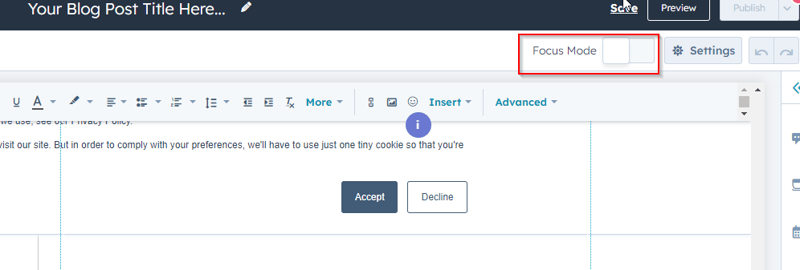
- At the time of writing this HubSpot has introduced an AI writing assistant. You may see the intro box popup. I would suggest watching the video to see how this function works within the blog environment. Keep in mind we also have Jasper AI for blog writing with predefined tones on a project-by-project basis.
- To write your blog post in a streamlined editing environment, click to toggle the Focus Mode switch on in the top right. You can turn this mode on or off at any time.
- To set the length of the post summary that displays on your blog listing page, you can insert a read more separator:
- Click the Blog content module.
- In the rich text toolbar, click the Insert dropdown menu and select Read more separator.
- Click the More separator and drag it to the desired position in the blog post.
- To add additional modules to the Blog post body module:
- In the left sidebar, click the add Add icon.
- Select Modules, then All.
-
- Click a module and drag it over the Blog post body module, then drop it in place.
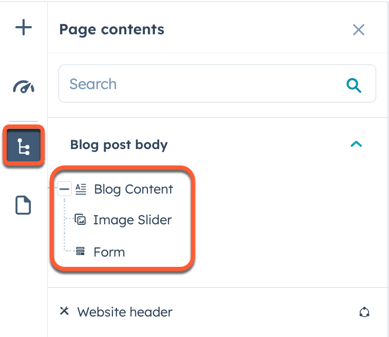
- To edit a specific module within the Blog post body module, click the siteTree Contents icon in the left sidebar, then click the module.
Editing Posts
Once you've edited your blog post content, you can customize page attributes like URL slug, meta description, and language.
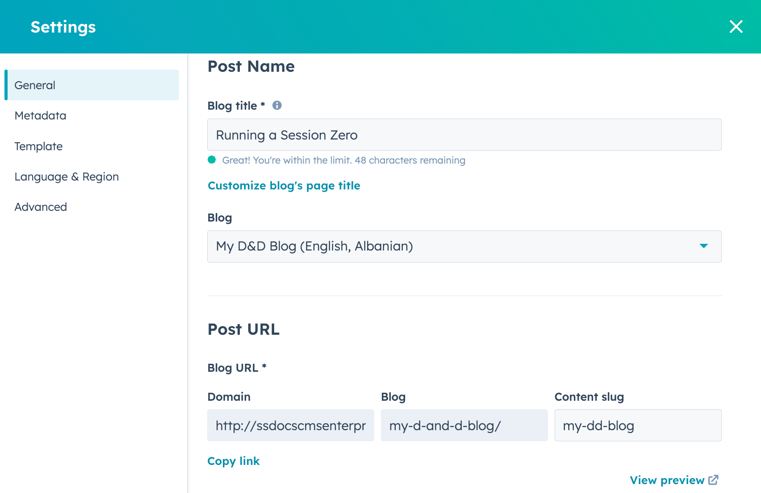
Customise basic post settings
- In your HubSpot account, navigate to Marketing > Website > Blog.
- Hover over a post and click Edit.
- In the content editor, click the File menu and select Blog settings.
- In the Blog title field, enter the name of the blog post. This name will appear in an h1 tag at the top of the post, its tab in the visitor's browser, and in search results.
- To separate the page's displayed title and h1 tag from the name of the page in the browser and search results, click Customize blog's page title.
- In the Blog title field, enter the title of the post that will appear on the page in an h1 tag.
- In the Page title field, enter the name of the blog post that will appear in the browser title bar and search results.
- To move the post to a different blog, click the Blog dropdown menu and select a blog. Once you publish this change, the URL of the post will automatically change to reflect its new destination. A redirect will be put in place from the post's previous URL.
- To edit the post's URL, enter a URL string in the Content slug field. Learn more about editing a blog post's URL.
- To set an author for the post, click the Author dropdown menu and select an author. Learn more about managing blog authors.
- To add an existing tag to the post, click the Tags dropdown menu and select the tag. To add a new tag, click the Tags dropdown menu, then type the tag into the field and click Add "[name of your new tag]" tag. Learn more about managing blog tags.
Featured Images
Set the featured image
To add a featured image that will be included when the post is shared on social media:
- In your HubSpot account, navigate to Marketing > Website > Blog.
- Hover over a post and click Edit.
- In the content editor, click the File menu and select Blog settings.
- In the dialog box, click Featured image in the left sidebar menu.
- Click to toggle the Enabled featured image switch on.
- Click Upload to select an image from your computer, or Browse images to select an image from the files tool.
- To increase accessibility, enter a description of your image in the Image alt text field.
Meta Description
Set meta description and campaign
- In your HubSpot account, navigate to Marketing > Website > Blog.
- Hover over a post and click Edit.
- In the content editor, click the File menu and select Blog settings.
- In the dialog box, click Metadata in the left sidebar menu.
- In the Meta description field, enter a description of the post's content that will appear in search results.
- To associate the page with a campaign, click the Campaign dropdown menu and select a campaign. To create a new campaign instead, select Add new.
Advanced Settings
Manage advanced post settings
- In your HubSpot account, navigate to Marketing > Website > Blog.
- Hover over a post and click Edit.
- In the content editor, click the File menu and select Blog settings.
- In the dialog box, click Advanced in the left sidebar menu.
- To add code snippets to the head HTML of the post, click the Head HTML field, then enter your code snippet. To add code snippets to all posts and pages on a domain instead, access your website settings.
- To change this blog's subscription email settings, click Manage in the Notification emails section.
Publish
Publish posts
- In your HubSpot account, navigate to Marketing > Website > Blog.
- Hover over a post and click Edit.
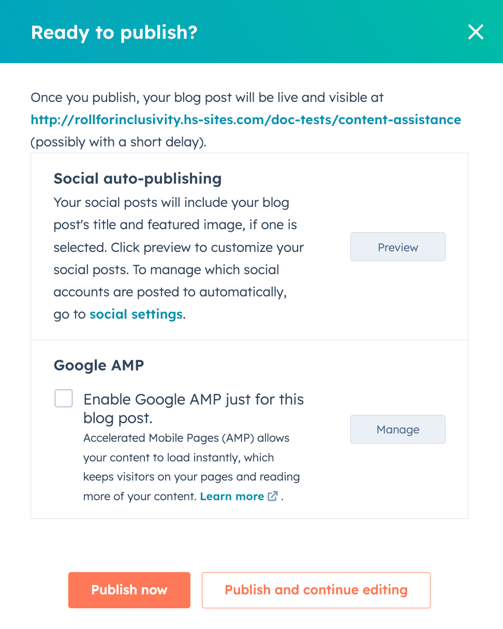
- To publish the post immediately:
- Click Publish in the top right.
- If you have social sharing turned on, click Preview in the dialog box to change how the post will appear on social media. In the right panel, edit the text and images that appear, then click Save.
- We can ignore AMP settings.
-
- In the dialog box, click Publish now.
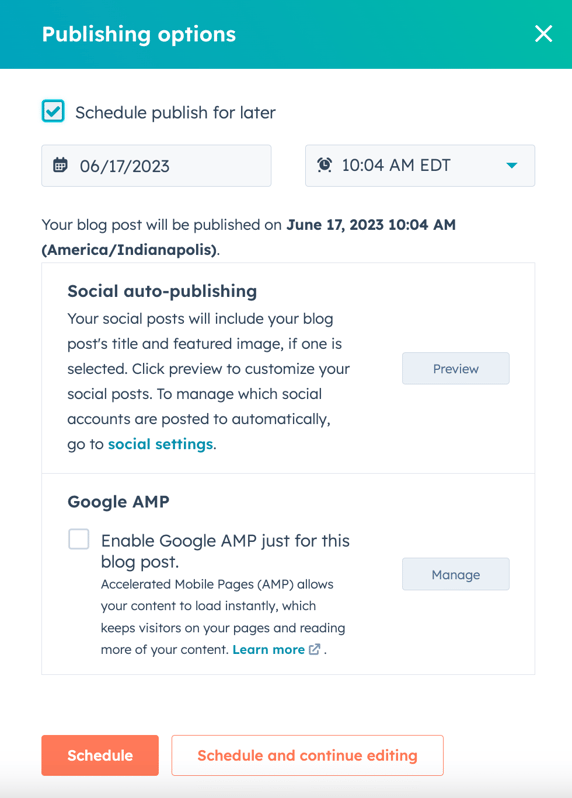
- To schedule a page for later publishing:
- In the top right, click the dropdown menu next to the Publish button, then select Publishing options.
-
- In the dialog box, select the Schedule publish for later checkbox.
-
- Click the date field and select the date when your page will be published.
- Click the time dropdown menu and select the time when your page will be published.
- If you have social sharing turned on, click Preview in the dialog box to change how the post will appear on social media. In the right panel, edit the text and images that appear, then click Save.
-
- Click Schedule, or click Schedule and continue editing to schedule the page's publication and return to the content editor.
SEO Optimisation
Optimise posts for search engines
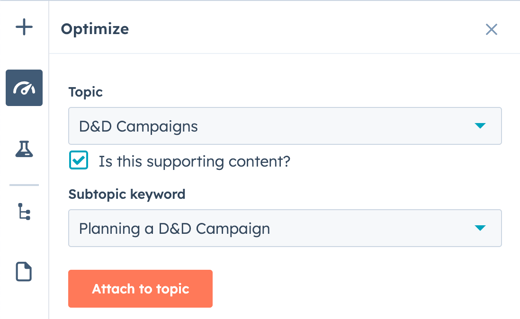
In the Optimise section of the sidebar editor, you can view a post's SEO recommendations or attach it to a topic.
-
Navigate to your content:
- Hover over the post and click Edit.
- In the content editor, click the gauge Optimize icon in the left sidebar.
- To attach the content to a topic:
- To add an existing topic, click the Topic dropdown menu and select a topic for your page.
- To create a new topic, click the Topic dropdown menu and select Add core topic. In the dialog box, enter the topic, then click Save
- To attach the post to a subtopic keyword:
- Select Is this supporting content? checkbox.
- Click the Subtopic keyword dropdown menu and select a subtopic keyword
- To create a new keyword, click the Subtopic keyword dropdown menu and click Add subtopic keyword. In the dialog box, enter the subtopic keyword, then click Save.
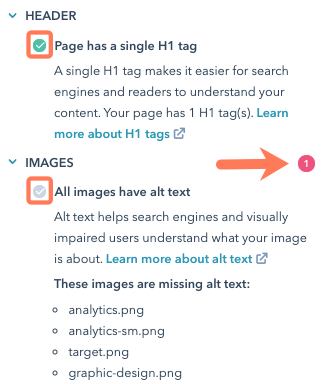
- To view incomplete SEO recommendations, click a category with a red circle. Each completed recommendation will have a green checkmark. Each incomplete recommendation will have a grey checkmark. Learn more about working with SEO recommendations.